
Evolution of Need
In the initial days of the pandemic, I had moved to the garage for my daytime work and also to conduct online classes. The rush of doing something new and the auto-imposed slow down on work in April/May 2020 meant, that taking down equipment and re-arranging it every week did not cause high friction. The pandemic was new to everyone and ability to do things were thought of as privilege instead of inconvenience. As time passed, after more Instagram Lives, video conferences and podcasts, the need for a dedicated ‘shooting’ area became apparent.
Definition of Problem
For artists who paint flat, or who paint while sitting down, filming with an over the table setup is possible. Studio Kelkar however, needed a setup that did not interrupt daily non-video recording painting activities while being ready to shoot at the drop of a hat. The setup also needed to be adjustable in angle to stay parallel to my painting surface to reduce post recording edits.
Evolution of Solution
Day 1
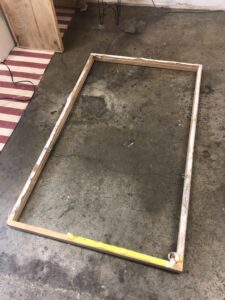
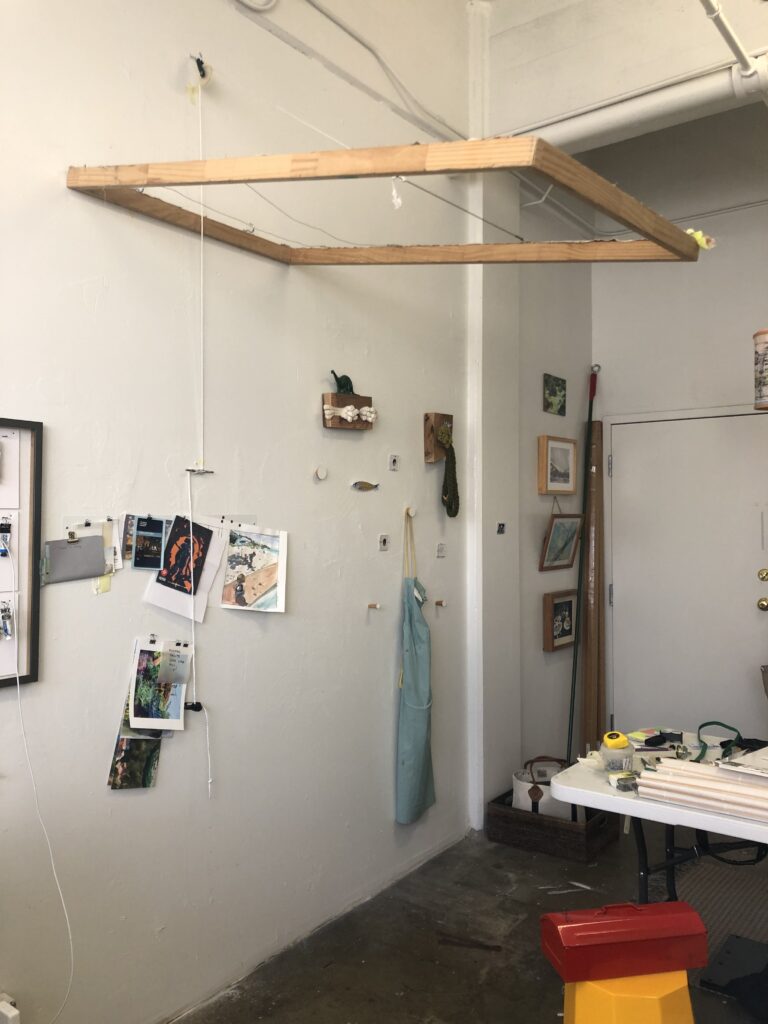
An answer came about by the way of a discarded oil painting frame that was left out for discarding in my studio building. It was very light and as I carried it to my studio, a plan brewed. What would happen if I could ‘hoist’ up this light frame?
Day 2
After all, I have a tall ceiling. And the wall at the top wasn’t in my way.
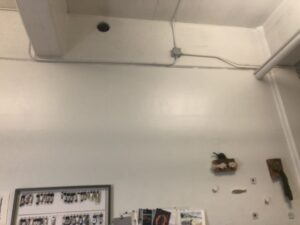
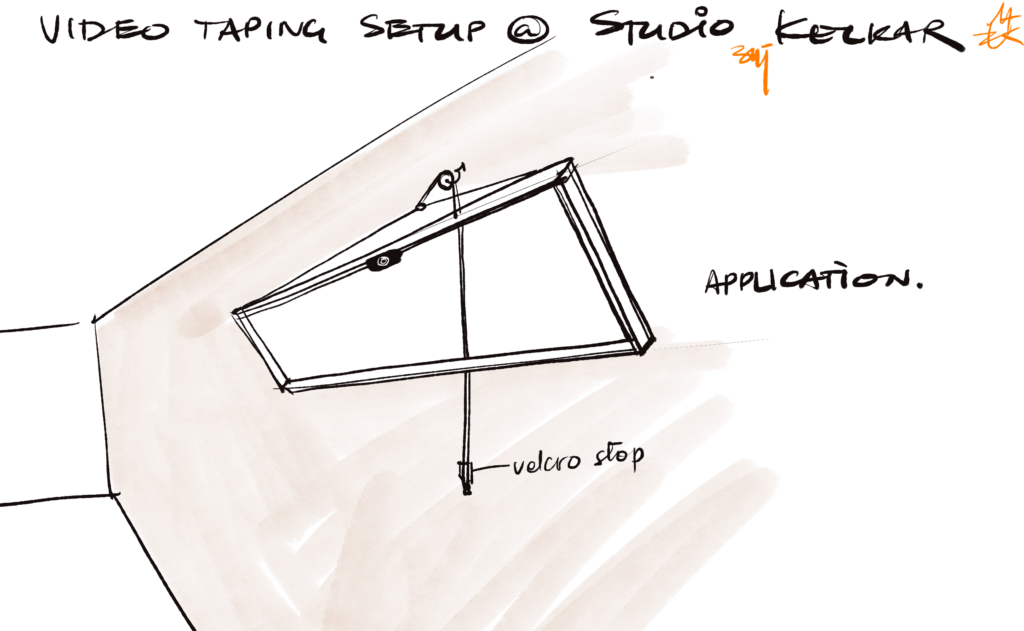
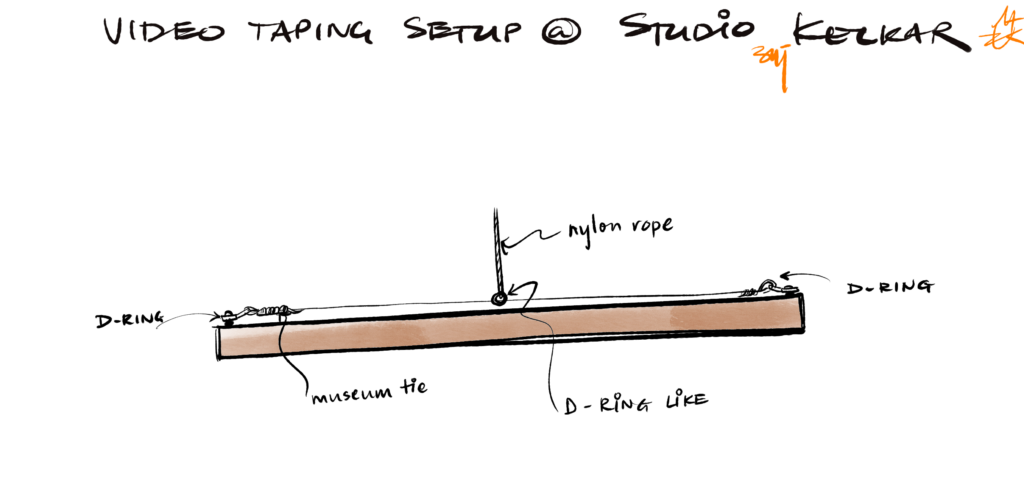
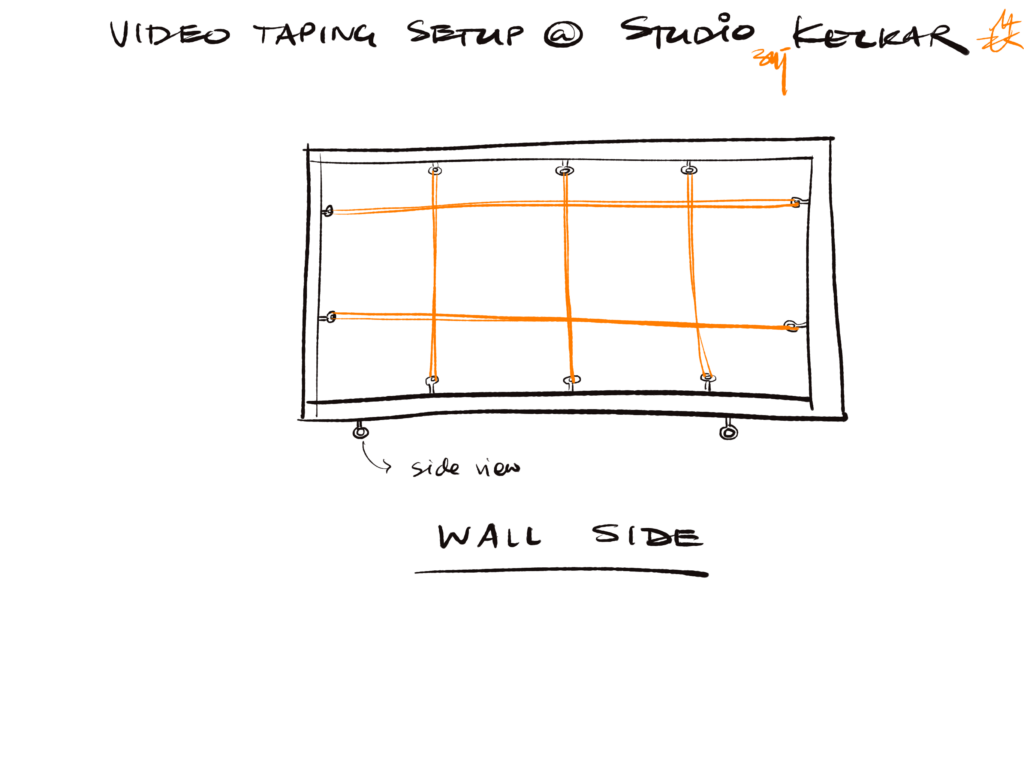
There was no preferred height measurement to be made. The limiting factor was my arm’s length + height of last rung of ladder. Where I could reach such that I could pressure on the drill perpendicular to the wall was the height of the setup. First step was to hold the frame up with a pulley, rope and a marine cleat. This actually took 2 days. While I finished marking on wall and adding hooks and loops to frame and wall, I couldn’t raise the frame single handedly up at an angle to hook the frame onto wall anchors. See image below to see hooks at back of the frame. The loops that went onto the hooks are nothing but standard framing D-loops.
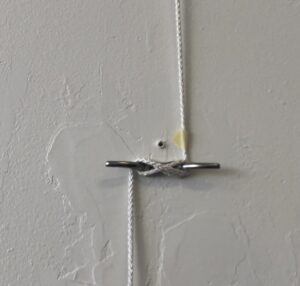
Once done, the frame was hoisted, nothing was placed under the setup. The nylon rope was marked with a piece of tape aligned with a hole in the wall. If after 3 days the tape had moved, I would be able to measure ‘slip’. 3 days passed without slip. However, if I moved the frame a bit, the rope would slip a lot swinging down quickly and hitting whatever was in its path. I got whacked.
Day 5
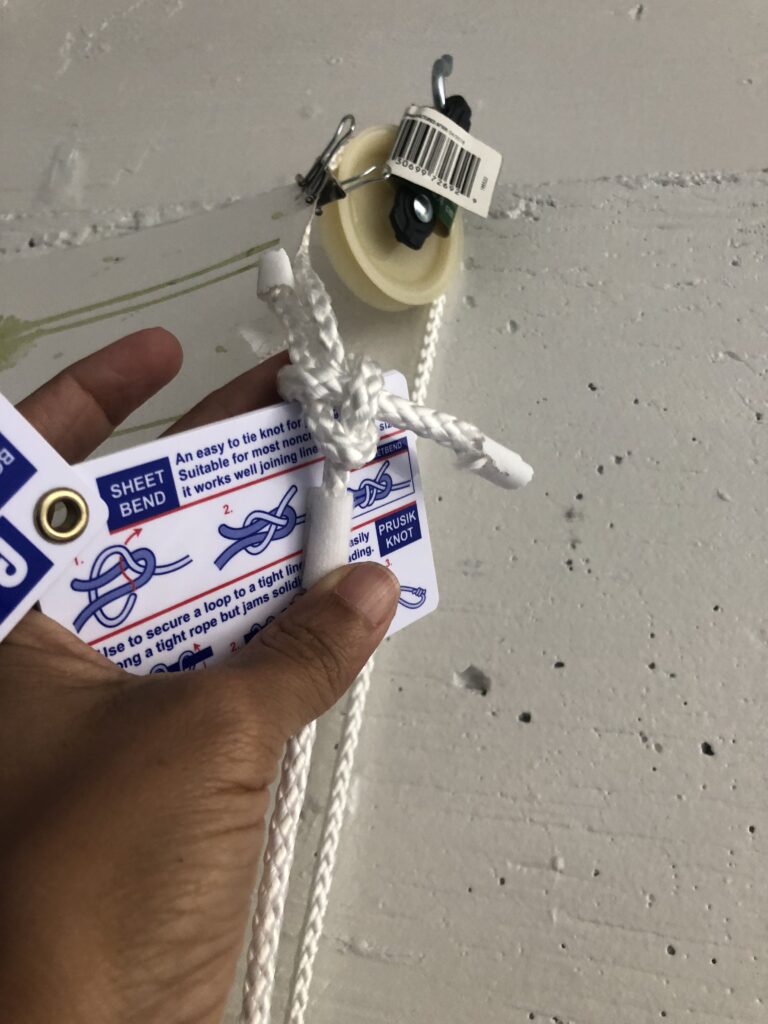
A Home Depot helper taught me a proper cleat hitch – and since then, the rope has been tight yet not so tight that any movement from the frame can snap it. For the extension of the rope that hangs down from the cleat, there is a puny ratchet that hangs onto the rope. It’s my safety. If the rope were to slip, the ratchet is so clunky, it will catch in the cleat. Another 3 days went in testing this feature. Again, nothing was placed under the setup.
Day 8
The physics of holding anything in tension is making sure that we balance moments, assuming no aging in the tensile strength of the rope. Then, adding a factor of 2 to it. To balance moments, one would have to ensure all mass was accounted for. The frame itself was light – it was going to be the cameras installed on it that would weigh it down. Before I tapped (tap = drill a threaded through hole) the frame, another 3 days were spent to test if just taping down the camera jigs and cameras in them would keep the frame from swinging down.
Day 11
I left my tripod under the setup. This is the part where engineering has nothing to do with the experiment but has everything to do with engineer feeling comfortable risking loved equipment. The camera was new, so no love was to be lost with that. It was the trusty tripod that I feared for. It survived.
Day 12
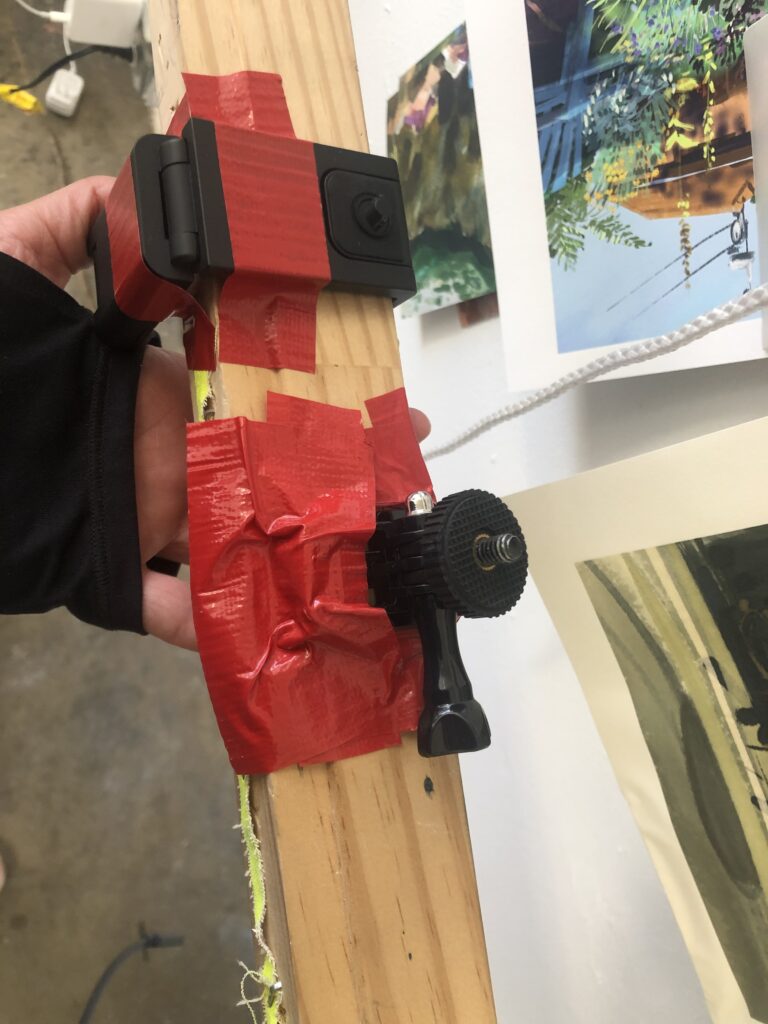
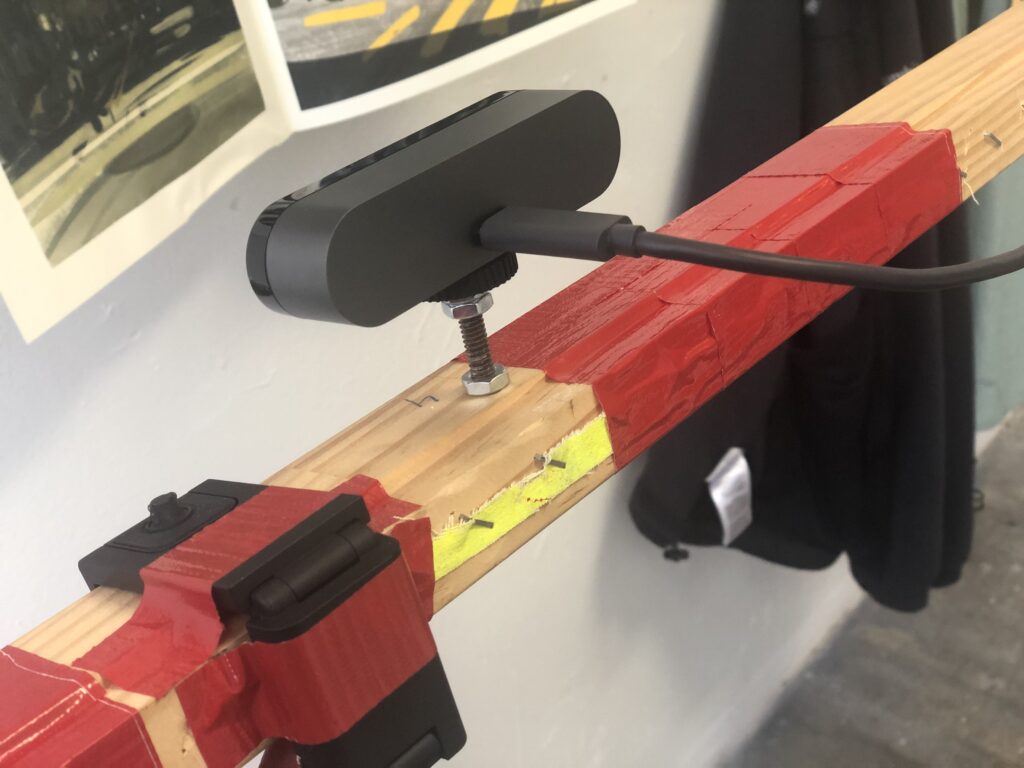
I duct taped the frame where my hand would touch the frame for adjusting it to avoid splinters from the old wooden frame. ¼” lug bolts (with either hex head or a flat head with a hex key slot) went in to make stable camera seats. If you go to Home Depot and every equipment feels like it has a different language written on its packaging, know that this is true. I go to hardware store alone and I open many random drawers – you never know what you’d find – I found soft end caps for the bolts this way. Going alone takes off the fear of being schooled by family members or looking stupid in front of close acquaintances. If you are a sketcher – drawing out your idea is very useful too. I also carry existing pieces from my garage to match to what I see in the store, so even if I know specifications for ¼” diameter bolt, I learn, for example, that the thread spacing has a different numbering system because the bolt in my pocket doesn’t match with the other 10 versions of also ¼” bolts. Hardware store employees are good help too.
Day 13
Some more refinements, Velcro straps were added for holding camera wires + the caps that cover the protruding bolt ends when camera seats/clamps are taken off. The frame has soft sticky cushions (the ones puts on furniture leg bottoms) on the side of the frame that pivots close to the studio wall so the wall and the frame don’t abrade.
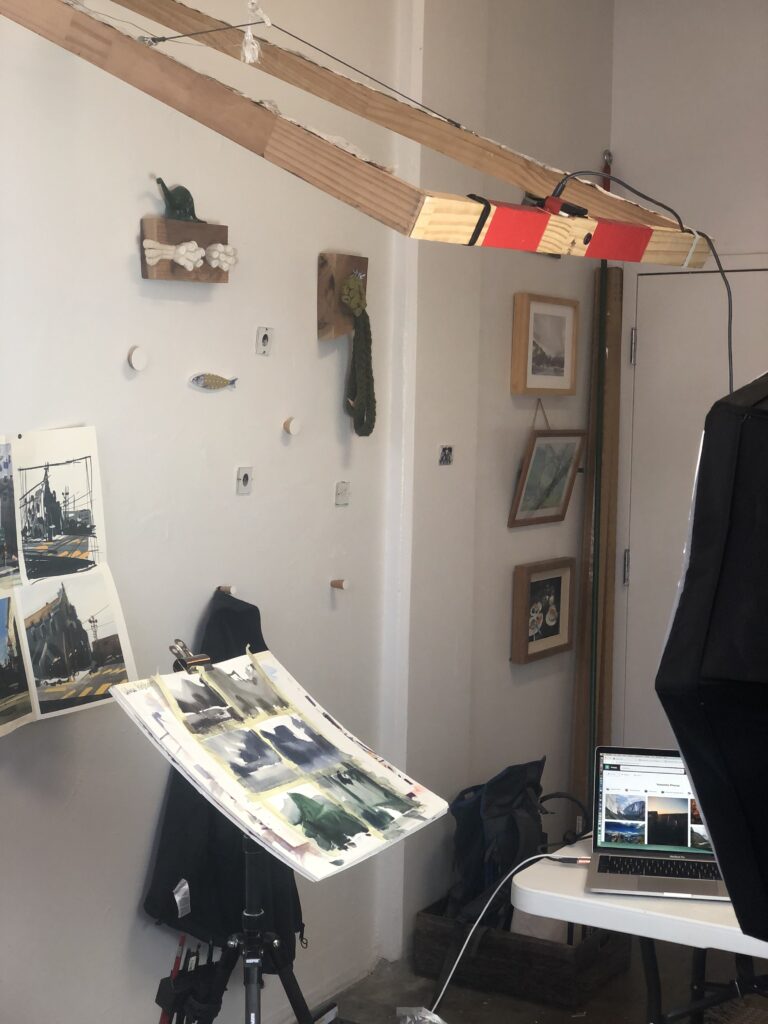
The camframe has been on duty since Jan 1, 2021 and has helped a masterclass, IG live and other live demonstrations. But it’s not done.
Refinement needs are:
- Estimating time of failure of rope and replacing it well before that.
- Add a reminder in calendar so I don’t have to remember to do so.
- Attaching a spool that retracts camera charging wires if using cellphone camera.
I would call the jig v1.0 done if the refinements can be made. These improvisations or machines I make, personalizes a studio to fit my lifestyle – something I enjoy very much.
Some history of tinkering
As I sat to write the article, it dawned on me that the tricks and gadgets have grown over time. My 15 yards of velcro just ran out – which means, I have 15 yards of attachable and re-attachable things in the studio. That’s pretty amazing! In a solo studio, there’s no event to celebrate this growth. And if the solutions don’t save more than one person’s time, then there will not be a crowd to celebrate it with either. So share this post! If you hone your camframe, I want to see it! Tag/Link this post and I will get notified.
Tools and raw materials we love in this studio: Velcro, moldable plastic, nuts and screws, pulleys, straps, ratchets, wheels, duct tape, nails, hammers, electric drills.
The sole artist of Studio Kelkar is 5’2”. The window handle is at 10’. Thus, we have (1) studio tongs put together from gardening and camping tools.
(2) We have pulley display systems. We have retractable clothesline painting display revealed during open house events. The studio stool is from a mechanic’s garage. I always had a customized painting board but this summer, I made 2 more extensions. Look out for the blog post in summer to see a (3) Velcro heavy reversible painting board for quarter sheets + an (4) extensible full sheet setup in addition to (5) Umiboard. Summer 2020 we made (6) removable palette nipples which work beautifully to date.
Can I then say that if you are a hacker/tinkerer, you take this ethos wherever you go and to whichever craft you do?


Ruturaj
April 7, 2021 6:19 amLoved it – the art along with “jugaad” !
umakelkar.com
June 19, 2021 12:35 pmThanks Ruturaj!
Carol Slabinski
February 25, 2022 3:38 pmOh, UMA!! You are brilliant and I so appreciate all of your tips, your sharing of this project, and your lovely style of things!! (Not to mention your watercolor mastery!!)
As a sailor, I do have a comment on your excellent thinking to estimate the age of the rope breaking. Certainly an admirable and eminently practical thing to do. What kind of rope you have bought for the purpose will have a lot to do with it. If you would consider replacing what looks like nylon rope or clothes line rope with marine rope – the kind used to secure boats in their marina slips, you will probably NEVER have to worry about it! Up until recently, I owned a 5 ton, 30 foot long sailboat. And marine ropes have held it through hurricane force winds!! And never failed us. All of our lines lasted 10 years in this kind of use! Thank you for your gracious sharing! Carol
Carol Slabinski
February 26, 2022 7:37 am……..(the hurricane force winds I speak of: twice – when Hurricanes Irene and Sandy hit the CT coastline. Our boat was in a marina behind a barrier peninsula with beach houses on it, and so it suffered winds somewhat less than what smacked the shoreline, but they were still fierce. This info for accuracy. West Marine stores sell dock lines (marine roping) that is not too expensive and so sturdy! Highly recommend for peace of mind.)